Wood + Aluminum
Horizontal Fence
Gate Installation

The SLIPFENCE is specifically designed for homeowners who want a warm and private wood fence, with the Stability and Endurance of an Aluminum Fence... AND... Simple to install.
Fully Private 6ft.
Gate
Fully Private 7ft.
Gate
Fully Private 8ft.
Gate
Fully Private 4ft.
Gate
Semi Private 6ft.
Gate
Semi Private 7ft.
Gate
Semi Private 8ft.
Gate
Semi Private 4ft.
Gate

6ft. Horizontal Gate Fully Private Installation Instructions

Fully Private Horizontal Gate Installation

We recommend gates wider than 48 inches requires a gate wheel (sold separately). 
1.

Take a measurement between your gate posts and subtract 1.5" and this is the length to cut the top and bottom 2 x 4 rails for your gate frame. 
2.

Cut 2 more pcs. of 2 x 4 lumber 59" each. These are the side rails of your gate frame.
3.

Lay these 4 cut boards on a flat surface and place the sides of the gate frame inside the top and bottom rails creating a rectangle frame. The side facing up is the inside of your gate that you will pull toward you when hung.
4.

Attach the 4 corner brackets to the inside of the frame with wood screws provided, and gussets down on the flat surface. Use all screw holes if possible, for a tight fit. Make sure to leave 8-10 wood screws to attach hinges later.
5.

Take the two brackets and position these onto the outside corners of the hinge side of your gate, sliding the gussets underneath the frame so all gussets are on the bottom side of the Frame.
6.

First screw these brackets to the frame using only the 2 bracket holes closest to the end of the bracket so there are only 2 screws in each bracket at this point.
7.

Position the top hinge on top of the outside brackets so that the inside flange holes of the hinge meet the two remaining screw holes in the side of the bracket. To loosen up the Hinge making it easier to attach to frame, using a flathead screwdriver simply press down on the top of the barrel of the hinge and turn clockwise.
8.

Once the proper holes of the Hinge flange are aligned with the holes of the outside bracket, proceed to screw through the hinge holes and bracket holes into the edge of the wood frame. Repeat this for the bottom hinge. Then screw in the face of the hinge to the frame filling all screw holes in the hinges, and the brackets with wood screws.
9.

A Cross Brace is recommended for all Horizontal Gates. To create a diagonal cross brace for added stability, lay another piece of 2x4 lumber underneath the frame diagonally between the bottom Hinge side corner to the top Latch side corner for strength and to prevent sagging, and pencil cut marks on the 2 x 4 and cut so it fits. Then screw in cross brace through gusset holes.
10.

Align the top Gate frame Rail 2.75" below the top of the top board of your fence line and attach gate frame to post with self-drilling screws provided.
11.

Make sure gate frame is level and plumb and swings freely within your gate opening before adding fence boards.
12.

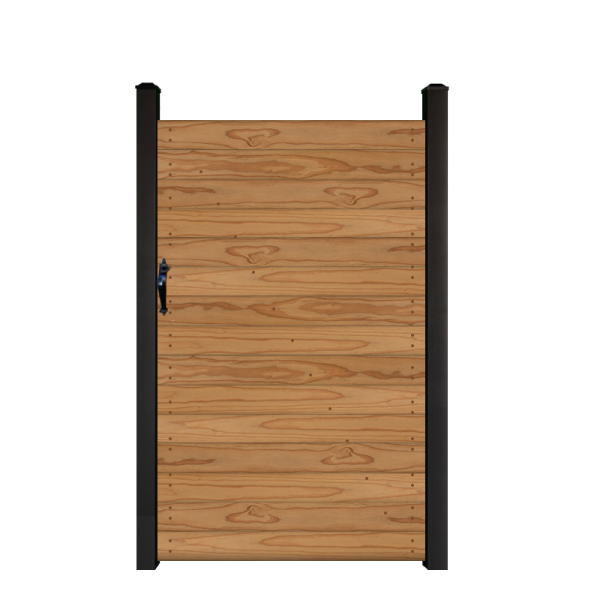
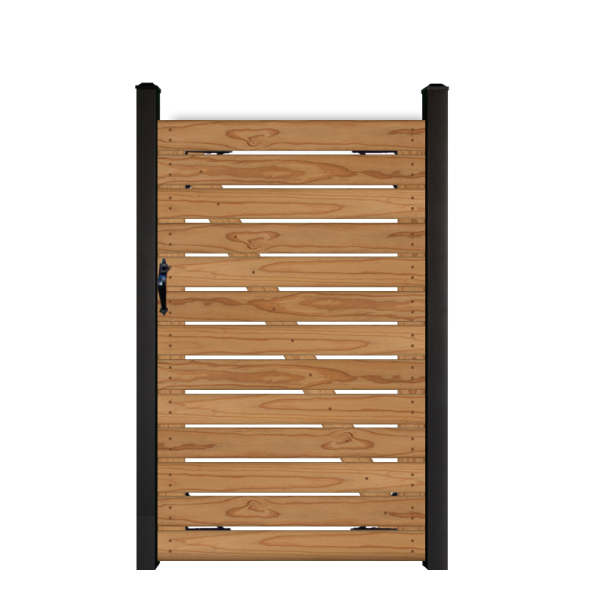
Cut 13 boards to the desired width of the finished gate (leaving 1/2" on either side to allow your gate to swing within the opening), start at the top board levelling it with the top board of the Fence line board and fasten with 2" or 2-1/4" deck screws (not included), to the frame from the inside so no screw heads are seen from the outside.
13.

Attach gate latch using GATE LATCH instructions provided.
14.

For Black straps to emulate Channels on Horizontal Gates as seen in the Slipfence gate Gallery, please go to www.Slipfence.com/gates/video  Click on Horizontal Gate Installation video.